Spiderman Pinata

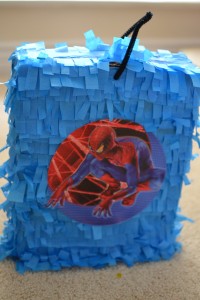
My little boy turns three this weekend and wants a superhero party! So far I have made Spiderman cookies and his pinata. I am still working on superhero capes and will make the cake closer to the party. Thought I would share this super easy pinata with you!

DSC_0002

Here’s how you too can make a pinata for less than 5 dollars in less than an hour!

1.  Find an old cardboard box, some tissue paper, a couple of glue sticks, a pipe cleaner, scissors, and tape.

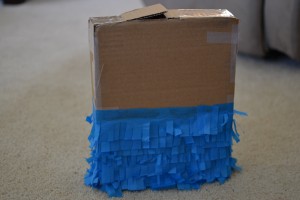
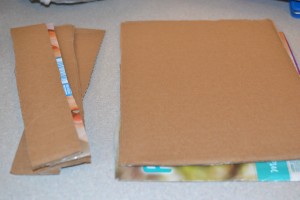
2.  Cut two identical shapes out of the box….for this one I used a small diaper box. I just cut the two large rectangular sides off.

 DSC_0036

3. Cut 2-3 inch strips of cardboard to complete the box.

4.  Tape the entire box together with scotch tape or masking tape. Leave an opening at the top to allow you to put candy or treasures inside. It kinda looks like a cereal box:)

DSC_0038 DSC_0040 DSC_0039

5.  Cut your tissue paper into three inch strips and cut slits in each strip to make the fringe. Use a glue stick to adhere the tissue paper to the box.

DSC_0044

6.  Cover the entire box and then add a decoration to the front.

7. Don’t forget to use the pipe cleaner as a hanger before you close up the pinata.  I add the hanger, fill with candy, and then glue tissue paper on the top!

DSC_0002

*Feel free to ask me any questions you might have and share your pinata pics. I have a few posts about making pinatas that are a bit more detailed so click here or here!


Water color painting a salt design

Here’s a fun activity to do with your kiddos!

DSC_0055

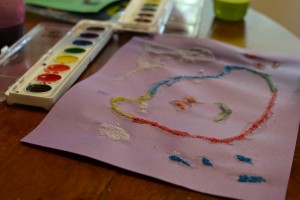
  • Grab some Elmer’s glue, thick paper, and salt.
  • Have kids make a design on the paper with the glue.
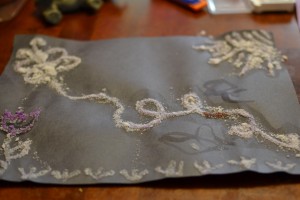
  • Sprinkle salt onto the design and shake off the excess.
  • Allow the picture to completely dry.
  • Grab water colors and have the kids paint the salt design. The watercolors spread slightly across the salt!

DSC_0057 DSC_0056

DSC_0062 DSC_0061

Cookie Dough Balls Dipped in Chocolate

DSC_0328

Cookie dough that’s safe to eat….yes please! These little treats are cookie dough balls covered in chocolate!

Ingredients:

  • 2-½ cups All-purpose Flour
  • 1-½ teaspoon Baking Soda
  • 1 teaspoon Salt
  • 1 cup Butter Or Margarine, Room Temperature
  • ¾ cups Sugar
  • ¾ cups Packed Brown Sugar
  • 1 teaspoon Vanilla
  • ⅓ cups Milk
  • 1 cup Mini Semi-sweet Chocolate Chips
  • 14 ounces, weight Milk Chocolate Candy Coating

Directions:

  • Beat butter and sugars and in a large bowl with electric mixer on medium speed until light and fluffy.
  • Add milk and vanilla.
  • Stir in flour, baking soda and salt and mix on low speed until incorporated.
  • Stir in chocolate chips.
  • Cover and chill dough for 1 hour.
  • When dough is firm enough to handle (it may help to lightly flour your hands), form dough into 1″ balls and arrange on a baking sheet lined with waxed paper. Place sheets in the freezer and let chill for 30 minutes.
  • Melt chocolate candy coating in the microwave in 30 second intervals until melted.
  • Dip cookie dough balls into chocolate and place on parchment paper to set.

Original recipe from Tasty Kitchen!

A cup of real mac n cheese

I came across a couple of posts on how to make mac n cheese in the microwave the other day and was instantly intrigued! I tried a few different recipes, but finally settled on my own version.  The nice thing about this is you can make one serving at a time quickly and without making a mess! You can use your favorite cheese and make it taste different each time!

DSC_0007

So here’s what I do. I use a large coffee mug, fill it with about half a cup of noodles (whatever ones you have in your pantry), cover the noodles with water, and microwave for about 5 to 6 minutes. The water will overflow and make a mess in your microwave so you might want to put a bowl under the cup:)  If the noodles aren’t quite done, you can add a little water and place back in microwave for a minute or two.  When the noodles are done, drain the water.  I like to mix in a small drop of butter, a tablespoon or two of milk, and about 1/2 cup of cheese.  You can use more or less of any of these things and make it your own.  My daughter prefers Colby jack cheese with a little parmesan thrown it!  I would say it is best to grate your own cheese as it melts better! I hope you enjoy making mac n cheese! This stuff is so much better than the stuff in a box;)