Lofthouse Style Cookies

DSC_0011

From time to time, I love picking up that little plastic box of Lofthouse cookies at the grocery store.  I have tried a few copycat recipes with little success. I will say these cookies are NOT a good copycat BUT they are certainly good.  Let me first say that I didn’t roll out my dough thin enough….these cookies were pretty thick.  One cookie and you had enough kinda thing! I will add they are soft:)

I wish I knew where I got this recipe and who to give credit to….but I can’t find the original link:( So here is the recipe:


Cookies:

6 Cups all purpose flour
1 teaspoon baking soda
1 teaspoon baking powder
1 Cup. butter, at room temperature
2 Cups. granulated sugar
3 eggs
2 teaspoon vanilla extract
1/4 teaspoon Salt
1 1/2 Cups Sour cream

Frosting:
1 Cups butter, room temperature
1 teaspoon vanilla extract
4 Cups powdered sugar
6 tablespoons heavy cream
Multi-colored Sprinkles


Directions:
  • In the bowl of a stand mixer with the flat beater attached, cream the butter and granulated sugar at medium speed until light and fluffy, about 3 minutes. Scrape down the sides of the bowl with a rubber spatula as needed. Add the eggs, one at a time beating until each is incorporated. Add the vanilla and sour cream and beat at low speed until combined.
  • Add the dry ingredients and beat at low speed until just combined, scraping down the bowl as needed. Dough will be a bit “sticky”. Divide dough into two sections. Roll out dough between two sheets of parchment paper to desired thickness. Chill in fridge for a couple hours.
  • Preheat the oven to 425 degrees. Line 2 large baking sheets with parchment paper or spray them with nonstick cooking spray, set aside.
  • I sprinkle powdered sugar on the dough prior to cutting. Use a cookie cutter to cut circles or other shape. Bake for close to 8 minutes (depending on size and thickness). You basically just want to make sure they are pale golden in color. Don’t overcook though!
  • To make the frosting, in the bowl of a stand mixer fitted with the paddle attachment, cream together the butter and vanilla. Slowly beat in the powdered sugar. Once smooth and creamy, add in heavy cream, 1 tablespoon at a time until the desired spreading consistency is achieved. If desired, add food coloring and beat until combined.
  • Once cookies have cooled completely, frost and add sprinkles. Allow frosting to set, then store in an air-tight container. Let cookies sit for several hours before serving to allow the flavors to develop.
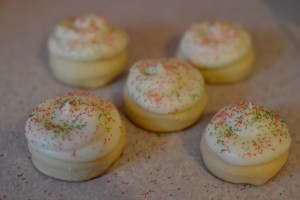
 

Makes approximately: 5 to 6 dozen cookies (will vary on the thickness of the dough)
DSC_0002 DSC_0003 DSC_0006


A Sweet Treat Just for the Feet

While looking for a Christmas present idea for my child’s teacher, I came across this super cute one for a cupcake made out of a pair of socks. This idea has been around and it is certainly not my original idea! I needed something to go with the gift cards I had already purchased…this was the perfect thing!

DSC_0025

So here is how I made these cute cupcakes!

You will need:

  • Fuzzy socks (Some of the socks have a pom pom on the ankle, which made for a super cute cupcake topper.)
  • Silicone baking cups (I purchased a pack of 6 from Wal-mart for $2!)
  • Rubber bands
  • Something to wrap them with (I bought a pack of cookie bags with silver cardboard circles for the bottoms from Wal-mart.)

*I bought socks, bags, and silicone wrappers for under 10 bucks….made 6 cupcakes!

How to make the cupcakes:

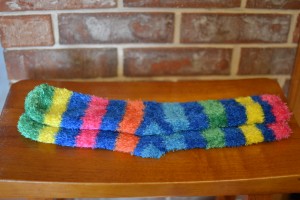
  • Lay your socks out flat.

DSC_0030

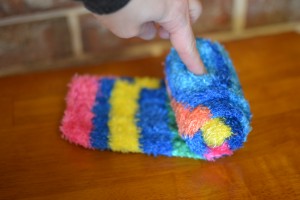
  • Roll the socks tightly.

DSC_0031

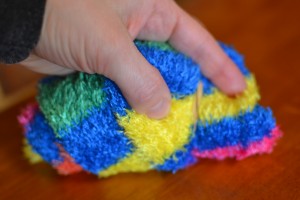
  • Place a rubber band around the bottom and gently pull one sock up to give the height to the shape.

DSC_0033

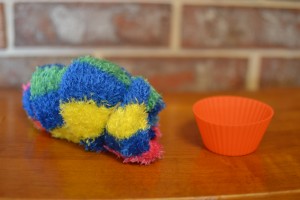
  • Now here’s your cupcake and liner.

DSC_0034

  • Place sock in liner and wrap however you would like!

DSC_0035  DSC_0042

Want to see more????

DSC_0027 Just for fun attach a card that says, “A sweet treat just for your feet.”

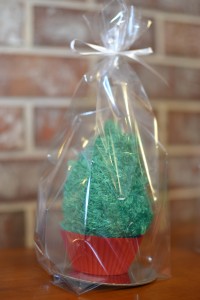
And how about a Christmas tree cupcake???

DSC_0038

*My sister even liked this project so much that she made some too….here are her sock cupcakes to show you!


Pretzel Christmas Trees


Isn’t this a cute idea? I found it on Pinterest…here is the original link! I made about 4 dozen of these treats in under an hour!

To make these you will need: (quantities vary depending on how many you want to make)

  1. Pretzel rods
  2. Green candy melts (I used three bags for 4 dozen trees)
  3. sprinkles
  4. wax paper
  5. ziploc bags

Directions:

  • Place pretzel rods onto sheets of wax paper.
  • Place one bag of candy melts into a large ziploc bag (sealed). Microwave at 30 second intervals until melted.
  • Snip a tiny corner of the bag and pipe tree shapes onto the pretzels.
  • Add sprinkles and let sit until completely dry!

That’s it! Too easy, not much clean up, and a cute treat! Win, win!

DSC_0015 DSC_0013

Gingerbread House Time

Each year I make gingerbread houses with my kids. I have always gone to the store and bought the kit. But now that I have three kids who each want to make their own, that just doesn’t fit in the budget and it is fun to say I made these from scratch! So this year I have chosen to make my own gingerbread houses. So let me first tell you, this is time consuming! But I enjoy the time in the kitchen, so this doesn’t bother me.  This is a fun project for mom and kids alike:)

DSC_0065

  1. First you need to make the cookie dough and let it chill in the fridge overnight. I made four batches of this recipe and was extremely pleased with the dough. It’s actually pretty tasty too.
  2. Here’s a little tip, once you make the dough divide into out into smaller batches. Place a batch of dough between two sheets of parchment paper and roll the dough out to 1/4 inch thick. Having spacers on your rolling pin really helps ensure the dough is all the same thickness and level.
  3. Place the rolled out dough (still between the parchment paper) onto a cookie sheet and leave in fridge overnight or for a couple hours at least.
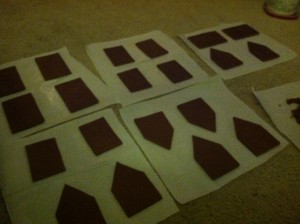
  4. Remove the top sheet of parchment paper. Use a sharp knife to cut out your pattern pieces. Leave the pieces on the paper and bake at 350 for 25 minutes or so.  *I found my pattern pieces online. You can print them for free. I just printed on regular paper and used that to cut the pieces out. If I could only remember where I found them I would share the link;) Sorry this picture was taken with my phone late at night….had to do this step while the kids were asleep!

IMG_4546

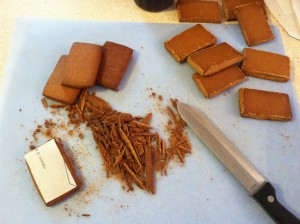
5.  Once the pieces are baked, let cool for a few minutes and then you will need to reshape them.  So by that I mean, grab a cutting board, serrated knife, and your pattern. Place pattern onto baked cookie. Trim the excess of cookie with the knife so that it is back to the original pattern size. *These cookies do spread a little when baking.

IMG_4558

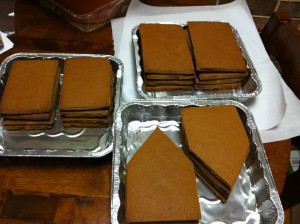
6.   Let your pieces harden and dry out overnight before assembling your houses.  Here are my pieces all set to go!

IMG_4547

7.  Assemble the houses using royal icing. To make royal icing:

  • In your mixing bowl, combine 1/4 cup meringue powder with 1/2 cup of water. Beat until a stiff peak forms.
  • Mix in 4 cups of powdered sugar and beat until glossy. You should have a toothpaste like consistency.  If not, add 1/2 cup powdered sugar at a time until you get the right consistency.
  • Use a piping bag and open tip to build the houses. It helps to have a friend help hold the pieces together while you pipe the icing. Let the base of house dry for a bit before adding the roof.  Then let the entire house dry for a couple hours before decorating.

8. And now for the fun, grab a variety of candies and make some more royal icing and decorate away!

A few actions shots…

DSC_0027 DSC_0033

The five houses we finished….decorated by two five year olds, a three year old, and two one year olds!  SO MUCH FUN!

DSC_0060 DSC_0051 DSC_0050 DSC_0044 DSC_0040

Let me know if you make gingerbread houses. Would love to hear all about it and see pictures.

* We used ice cream cones to make the trees!