Banana Bread

DSC_0001

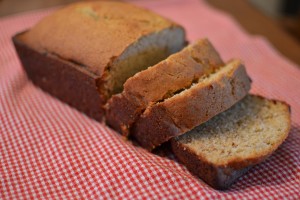
Ever wondered what to do with those brown bananas that are a tad too mushy to eat? Make banana bread….my daughter says brown bananas simply make the best bread!  I will go ahead and let you know this is not a healthy version of banana bread, but it is delicious!  Make it if you dare!


Cream  together:

½ cup  Crisco

1   cup  Sugar

Mix in 2 eggs (1 egg   at a time)

Mix   together:

2     cups  Flour

½   tsp baking soda

½   tsp salt

Add flour mixture to cream mixture

Beat   in:

           ½ cup nuts (pecans or walnuts)…optional, I leave these out:)

           1 cup crushed bananas (I just throw in three whole bananas)

Bake at 325 for 1 hour


*This recipe was sent to me from my sister. Her friend, Peggy, sent it to her and said it was her grandmother’s special recipe!


AND here’s another favorite banana bread recipe from my sister!

Ingredients:

1/2  cup (1stick) butter, at room temp.
1 cup sugar
1/2 tsp salt
2 eggs
1 tsp vanilla
1 1/2 cups all-purpose flour; sifted
1 tsp baking soda
1 tsp baking powder
3 ripe bananas, mashed

Directions:

Preheat oven to 350 degrees. Grease a 9 X 5 inch loaf pan. In a mixing bowl (I just mix by hand), combine butter and sugar; mix well. Add the salt, eggs, vanilla, flour, baking soda, baking powder, and bananas, and mix well. Pour the batter into the prepared pan and bake for 50 minutes.

** I have started adding about a cup of chocolate chips.  I don’t measure, just dump them in until I am happy with the amount.

My favorite tip that someone shared with me that if you have butter or cream cheese that needs to be softened to room temp, put stick in the microwave for 5 seconds, rotate, 5 more seconds, rotate, 5 more seconds, rotate….continue until softened.  Works so well and doesn’t melt!!!

Thanks, Laurie, for sharing with us today!


Butterfinger Cookies

DSC_0014

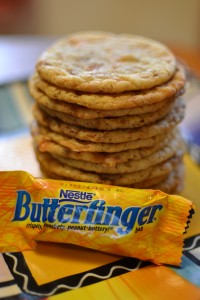
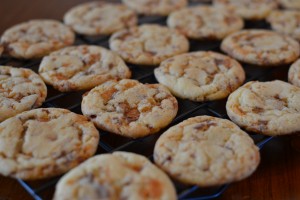
This summer our community group (family Bible study group) made cookies for our local fire departments as a small token of our appreciation for their service to our community. My friend Val made some really yummy Butterfinger cookies that my husband loved.  So I ended up making a couple of batches of these cookies just for him.  I made them again today and thought I would share with you!

Ingredients: (makes around 4 dozen good sized cookies)

3 and 1/2 cups flour

1 teaspoon baking soda

1 teaspoon baking powder

1/2 teaspoon salt

1.5 cups sugar

2 sticks of butter (1 cup), softened

2 large eggs

16-20 fun sized Butterfinger candy bars, chopped

Directions:

  1. Combine flour, baking soda, and salt in a medium sized bowl. Set aside.
  2. Cream butter and sugar in your mixing bowl for about five minutes until it is light and fluffy.
  3. Add eggs one at a time, beating well after each egg.
  4. Slowly add in the flour mixture.
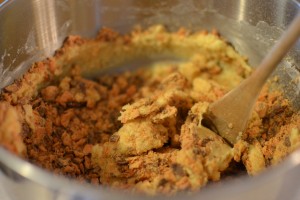
  5. Fold Butterfinger pieces in by hand.
  6. Drop dough by spoonful onto cookie sheet.
  7. Bake in a preheated oven at 375 for 10-12 minutes. Watch closely as they brown quickly after that 10 minute mark.

DSC_0001 (2)

DSC_0058

 Original recipe adapted  from Sally’s Baking Addiction.

Decorating Sugar Cookies with Royal Icing

SO excited to share this post with you. My talented sister, Jess, has started decorating sugar cookies with royal icing…something I’ve only done once. I think she has it mastered!  I asked her to share her secrets…..Here you go, straight from the pro!
Cookie Ingredients:
2 1/2 cups of unsalted butter at room temperature
2 eggs at room temperature
3 teaspoons of vanilla
5 cups of all purpose flour
1 tsp of salt
2 cups of white granulated sugar
Here is what I do: (after a lot of trial and error)
1. Cream the butter and sugar
2. add eggs and mix
3. add vanilla and mix
4. mix salt and flour and whisk together
5. slowly add the flour to the creamed butter mixture
6. mix on low approx 30 sec then scrape the sides and mix again
7. It is mixed when it clumps around the paddle
I divide the dough into 4 sections and roll it out on parchment paper- 4 separate sheets with 4 separate dough circles (use rolling pin and roll out) and then I refridgerate the dough overnight.
The next day, I cut out the shapes and put them on parchment paper on a cookie sheet and pop them in the freezer for 15 mins or so. Then I bake them in my oven for 16 mins on the same parchment paper (time varies depending on thickness of the cookie) at 350. I cool them for 5 min on the hot cookie sheet and then transfer the whole paper with the cookies on it to cooling racks. Don’t put frozen cookies on a hot cookie sheet, FYI.
The next day, I decorate them with the royal icing.
This is what I use:
1/4 cup of Meringue powder
4-5 cups of powdered sugar
1/2 to 3/4 cups of warm water
Royal icing is very tricky. The consistency has to be just right or it will make a mess. I have practiced a whole bunch and sometimes still don’t get it right.
I use decorating bottles but you can also use Wilton icing bags too.
The first step is to outline the cookie- the icing needs to be thick like toothpaste. I use a #3 tip to outline and a #1 tip to flood.
Then you must let that dry- takes about 10-15 mins.
Then you will need what is called flood icing- this fills in the cookie and it has to be runny but not too runny! You outine the cookie again with the flood icing making sure to touch the outline icing. Then fill in the cookie with the flood icing- I usually start at the top and make zig zag lines. Then you have to gently shake the cookie and the icing will settle. (If it is too thick it will not smooth out). Pop any bubbles with a toothpick. This takes approx 24 hours to dry completely. You leave the cookies out overnight uncovered- the icing keeps the cookie from drying out.  You can add a second color to your flood icing after it dries if  you want to write on the cookie or make a design but the first layer of flood icing must be DRY!
There are tons of videos about decorating cookies- I have watched a lot to figure out how to do this and practiced myself a ton! I learn something everytime I do them- like I said trial and error
Thanks Jessica Franks for this post on how to make and decorate sugar cookies!
Here are some more cookies Jess has made!

Old Fashion Sugar Cookies

DSC_0047

Today we made some old fashion sugar cookies and decorated them with a basic buttercream icing. Since the Broncos are playing tonight, we decided Bronco decorations were only fitting! This is a great sugar cookie recipe given to me by my husband’s sweet Aunt Lauri!  It is great for rolling out and using cookie cutters…

Ingredients:

2 and 3/4 cups all purpose flour

2 tsp baking powder

1/2 tsp salt

1/4 c shortening (Crisco)

1/4 c butter

1 c sugar

2 eggs

1 tsp vanilla

Directions:

  • Sift together the flour, baking powder, and salt.
  • Using your mixer, cream the shortening, butter, and sugar.
  • Beat in the eggs one at a time and then add the vanilla.
  • Slowly add the flour mixture and mix well.
  • You can chill the dough (or not)!
  • Roll dough out onto floured surface and use cookie cutters of desired shape.
  • Bake cookies at 400 for 10 to 12 minutes.