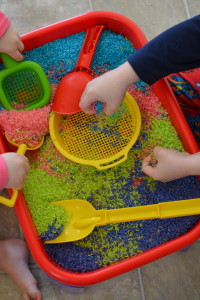
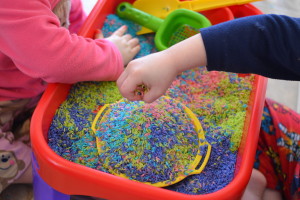
Colored Rice for Sensory Play

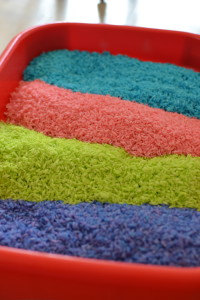
I love making things to fill our sensory table.  Today we decided to try coloring rice, and I am happy to share my kids are having a blast! It was easy to make too! Not at all a new idea but I will share how I made ours!

DSC_0003You will need:

  1. Rice
  2. Vinegar
  3. Food coloring

*Optional: essential oils of your choice. I added a few drops of peppermint or lemon oil to each batch to help cut the vinegar smell.

Directions:

  1. In a large ziploc bag combine two tablespoons of vinegar with several drops of food coloring until you get the desired color.
  2. Add in two cups of dry rice and seal the bag.
  3. Have your kids shake the bag until all of the rice is colored.
  4. Lay out a piece of foil and pour the rice onto it.
  5. Spread the rice around to make a thin layer and allow to dry for an hour or so.
  6. Enjoy!

DSC_0008

DSC_0010


Gooey Butter Cookies

I am not a huge cookie fan but these little things are a treat!  Super soft and delicious! Go ahead and make some….

Ingredients:

  • 8 oz cream cheese, softened
  • 1/2 cup salted butter, softened
  • 1/2 teaspoon vanilla extract
  • 1 large egg
  • 1 yellow cake mix
  • 1 cup of powdered sugar

Directions:

  • Beat the cream cheese, butter, vanilla, and egg with a mixer until light and fluffy.
  • Pour the cake mix into the butter mixture and mix with a wooden spoon until completely combined.
  • Put the powdered sugar into a small bowl by itself.
  • Use a spoon to grab a small amount of cookie dough and throw it into the powdered sugar. Now pull it out and roll into a ball.
  • Place cookie balls onto a cookie sheet lined with a silpat or parchment paper.
  • Bake cookies for 12 minutes at 350!

These cookies are so good straight out of the oven!!!!

Recipe credit goes here!

Sugar Cookies with Buttercream Icing

I have tried lots of sugar cookie recipes, and I have to say the most recent one I tried is worth sharing. I made cookies for my daughter’s valentine party at school.  I wanted to make some really cute ones with royal icing but realized meringue powder has a peanut allergy warning label so that was out.  So I did some research on using buttercream icing.  It’s my fave.  I wanted to be able to pack the cookies into a tiny box and stacking them would have been ideal. Only problem is you can’t stack cookies decorated with buttercream. However, I slightly melted the buttercream and it did in fact dry a little harder than it might have.  Here’s what I did:

IMG_5153

Cookies (makes a small batch of dough): I made 36 small cookies with one batch.

IMG_5144 IMG_5146

Ingredients:

  • 3 cups flour
  • 1 teaspoon baking powder
  • 1 cup unsalted butter, room temp
  • 1 cup sugar
  • 1 large egg, room temp
  • 1 teaspoon vanilla

Directions:

  1. Whisk the baking powder and flour together in a bowl.
  2. In your mixer, cream the butter until its light and fluffy…takes a few minutes.
  3. Add sugar to the whipped butter and mix again.
  4. Add in egg and vanilla then mix.
  5. Slowly add in the flour mixture one cup at a time.
  6. Gather up the dough into a ball and wrap in saran wrap.
  7. Place the dough into the fridge for about 20 minutes.
  8. Roll dough onto a lightly floured silpat or piece of parchment.  I place a piece of wax paper over the dough so it doesn’t stick to my rolling pin.  Roll the dough to 3/8″ for thick soft cookies and cut as desired.
  9. Place cookie sheet of cut out cookies in fridge while oven preheats to 350.
  10. Bake at 350 for 7-10 minutes.
  11.  Decorate as desired.

Buttercream icing:

Ingredients:

  • 1 stick of salted butter
  • 3 cups of powdered sugar
  • 2 teaspoons vanilla
  • 3 Tablespoons heavy whipping cream, half and half, or milk

Directions:

  1. Cream butter in your mixer until light and fluffy just as you did for the cookies.
  2. Slowly add in powdered sugar, vanilla, and whipping cream.
  3. Add food coloring if desired.
  4. Put icing into a microwave safe bowl and slightly melt it for 30 seconds.
  5. Pour the icing into an icinig bag or bottle. I use a cheap condiment bottle from walmart.
  6. I just squeezed the icing onto the cookies and let them dry.


Homemade Yellow Cupcakes

Let’s start with this fact….I have only made one cake from scratch before and it was chocolate.  I usually start with a box mix and add to it….gasp… I know!  My daughter is having a Valentine’s party at school like most kids.  Some schools have  a policy that only store bought items can be sent in and having been a classroom teacher I totally get that!  However, not all schools have that policy.  My daughter’s school allows homemade treats BUT when making something you have to be extremely careful about the ingredients so as to prepare things for allergy prone kids.  I did a ton of research on box mixes, types of icing, etc.  I learned that meringue powder has a peanut allergy warning on the can and some sprinkles do too. I had no idea!  Well anyway, I decided to make cupcakes and cookies from scratch making sure each ingredient was peanut free!  The yellow cupcakes turned out so well I thought I would share. This recipe is a super sweet cupcake that is light and fluffy.  I topped them with homemade buttercream icing for the kiddos but next time I think I will top them with chocolate!

Ingredients:

  • 2 and 1/3 cups all-purpose flour
  • 2 and 1/2 teaspoons baking powder
  • 1/2 teaspoon salt
  • 12 Tablespoons unsalted butter, softened to room temperature
  • 1 and 3/4 cups granulated sugar
  • 2 large eggs, room temperature and separated
  • 3 teaspoons vanilla extract
  • 1 cup whole milk (I used buttermilk)

Directions:

  • Preheat oven to 350F degrees. Line a 12-count muffin pan with cupcake liners or a mini muffin pan with liners.

For the cupcakes:

  • Whisk the flour, baking powder, and salt together in a medium bowl. Set aside.
  • Using a handheld or stand mixer fitted with a paddle attachment, beat the butter on high speed until smooth and creamy – about 5 minutes.
  • Add the sugar and beat on high speed for 3-4 minutes until creamed together well.
  • Scrape down the sides and up the bottom of the bowl with a rubber spatula as needed. Add two egg yolks and the vanilla. (Set the egg whites aside.)
  • Beat on medium-high speed until combined. Scrape down the sides and up the bottom of the bowl with a rubber spatula as needed.
  • With the mixer on low speed, add the dry ingredients in three additions alternating with the whole milk, beginning and ending with the dry ingredients, and mixing each addition just until incorporated. Do not overmix.
  • In a separate bowl beat the 2 egg whites until thick and foamy. Fold into cupcake batter. The batter will be smooth, velvety, and slightly thick.

Spoon batter into cupcake liners filling 1/2 – 2/3 of the way full. Bake for 18-21 minutes or until the tops of the cupcakes spring back when gently touched and a toothpick inserted in the center comes out clean. Don’t overbake; your cupcakes will dry out. Allow to cool in the pan for 5 minutes, then transfer to a rack to cool completely.

Recipe from here! You will find a great chocolate icing recipe on her blog too!

*Mini cupcakes took about 12 minutes to bake!