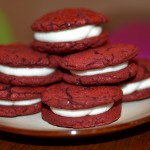
Red velvet cake cookie sandwiches

With my parents in town, I haven’t been in the kitchen as much or making many crafts with this kids this week.  We have been too busy exploring the beautiful Rocky Mountains!  My mom asked me to help her figure out how to make red velvet cake cookies with a buttercream icing. So I found some recipes, and we got started. Let me just add I am not a fan of red velvet cake but this one is for my mom and it was good! You could use a chocolate cake mix instead, and in my opinion these would be even better!
DSC_0016

For the cookies:

1 box of red velvet cake mix (or any flavor you want)

1/2 c vegetable oil

2 T all purpose flour

2 eggs

Directions:

1. Combine cake mix and flour and stir. Mix in eggs and oil until well blended.

2.  Use an ice cream to scoop a small amount of dough and roll into a ball.

3.  Bake at 350 for 8-10 minutes.

4.  Let cool.

For the icing:

1 stick salted butter (1/2 cup), softened

1/2 c crisco (vegetable shortening)

2 teaspoons vanilla extract

4 c powdered sugar

2 T milk

Directions:

1.  Beat the crisco and butter in the bowl of your mixer until fluffy. For about 5 minutes.

2.  Add in vanilla and mix.

3.  Add in powdered sugar, 2 cups at a time and mix well.

4.  Add milk to make icing into your desired consistency. For these cookies, I wasn’t doing any detailed decorating so I used the full 2 T milk to make the icing fairly soft!

*Using a Wilton icing tip, I piped the icing onto the back of a cookie and topped with another cookie!

Making Crystals

Once upon I time, I tried making rock candy (sugar crystals) with a couple of my fourth grade classes. It was a tricky experiment with mixed results. I will say that the kids had a blast. I’ve thought about making sugar crystals with my own kids lately, but just not sure they are ready and patient enough to wait the entire week or two that would take. That being said, crystals are still so fun. I set out to find an alternate….one they can admire but not eat and it has to be a quick one for the little impatient (did I say that?) I meant, inquiring:) minds!  Here are a few pictures from about 8 years ago when making rock candy crystals in my classroom!

DSC01032DSC01033


DSC01067

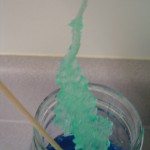
I found this experiment for borax crystals probably a year ago. The kids loved it, and it was super fast.  At the request of my oldest, we decided to make borax crystals today! Want to make some too?

You will need:

  • water
  • borax
  • pipe cleaners
  • food coloring (optional)
  • Popsicle sticks or a pencil
  • mason jars

Directions:

  1. Have kids make a design with the pipe cleaners. Make sure it will fit into the jar without touching the bottom or sides.
  2. Attach the design to a Popsicle stick. Original directions say to tie a string to the stick and the pipe cleaner. I tried this but it was too tedious for me…Just wrap the pipe cleaner around the stick. Make sure the design will hang far enough into the jar…center is good!
  3. Bring a large pot of water to a boil.
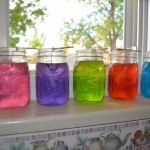
  4. Pour water into your jars. For each cup of water, mix in three tablespoons of borax. Add food coloring if desired.

DSC_0047

        5. Gently lower designs into the jars and lay the popsicle stick on top so the design is suspended in the jar.

DSC_0050DSC_0049DSC_0051

       6. Crystals will start forming pretty quickly.  Be sure to set jars in a place where they won’t be disturbed.

          Check out our crystals  after only an hour!

DSC_0001 (2)

In about 24 hours you can pull out the designs and see what you have. These make great sun catchers!

DSC_0052     Tomorrow I will update with the finished product!

Our finished crystals after 24 hours!

DSC_0015 DSC_0043 DSC_0050 DSC_0051

*Original idea came from Steve Spangler’s science experiment website!

French bread

image

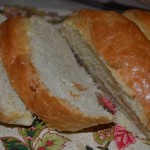
If I had to chose two types of food to survive on…..it would be desserts and bread!  I enjoy making anything with sugar and any type of bread!  I didn’t have much time tonight, so I set out for a quick rise bread.  I found an amazing French bread recipe.  When I think of French bread, I think of crispy outside with a light, airy inside.  This recipe  isn’t quite that but the bread was nonetheless delicious!  Not many yeast bread recipes are this quick and easy!  Give it a try….and let me know if you do!

 DSC_0021

Ingredients: (makes one loaf)

1 and 1/4 c warm water

1 Tablespoon of active dry yeast

1 Tablespoon sugar

1/2 Tablespoon salt

1 Tablespoon olive oil

3 c bread flour


Directions:

  1. Pour water into the bowl of your mixer.  Stir the sugar and yeast into the water.  Let stand for about five minutes or until yeast is bubbly.
  2. Add in the salt, oil, and flour.  Mix ingredients all together using the dough hook.  Let it mix on low speed for about five minutes.
  3. Let dough rest in the bowl for ten minutes.
  4. Roll dough into a large rectangle.  I prefer rolling it out on parchment paper.
  5. Now let’s make the loaf by starting with the long side of the rectangle.  Roll it tightly toward the opposite side into a log.  Pinch seams together. Place seam side down.
  6. Using a serrated knife, cut a few slits into the loaf.  Sprinkle with a little white cornmeal.
  7. Let the dough rise for 30 minutes.
  8. Preheat oven to 375.
  9. Lightly brush top of loaf with water.  (I actually forgot to do this and it was just fine.)
  10. Bake for 25 minutes.
  11. Brush with melted butter and enjoy!


You can find the original recipes as well as some other yummy looking things here!

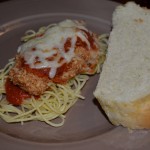
Just as a side note: I served this amazing french bread with an equally amazing baked chicken Parmesan.

DSC_0022

Here is the recipe for the chicken Parmesan.

And this is what little tot did while I enjoyed this dinner….

DSC_0035

 Not too bad for her first time feeding herself…and she’s not even one yet:)