Oreo Truffle Cupcakes

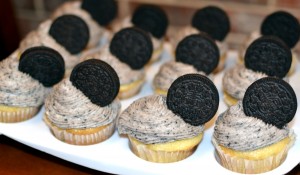
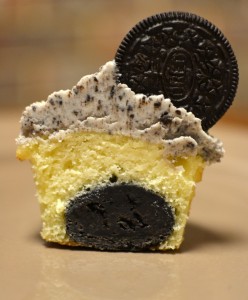
My best friend (Lisa) is in town, and we have had the best week in the kitchen together. We saw a recipe for Oreo truffle cupcakes and gave it a try. The cupcakes turned out so GOOD!

insidecupcake

So here’s how you too can create these cupcakes!

Oreo Truffle Directions:

  • Crush an entire bag of Oreos in your food processor.
  • Pour Oreos into a bowl and hand mix in an 8 oz block of cream cheese (softened).
  • Make 1 inch balls and place on a cookie sheet. (You will need at least 24 balls.)
  • Put cookie sheet in freezer for at least 20 minutes.  I actually froze the Oreo balls overnight in a sealed container.

Cupcake Directions:

  • Make cupcakes according to the directions on box.
  • I made a french vanilla cake mix.
  • Line cupcake wells with paper cups.
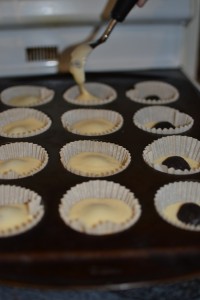
  • Pour a little cake batter into each cup.
  • Place one Oreo ball into each cup.
  • Cover the balls with another spoonful of cake batter.
  • Bake as directed on the box.
  • Let cupcakes cool before icing.

DSC_0026

Buttercream Icing Directions:

  • Take two sticks of unsalted butter and bring to room temperature by allowing them to sit on the counter for about 15 to 30 minutes.
  • In your mixer, beat two sticks of butter (1 cup) for about five minutes.  You will want to make sure the butter is light and fluffy.
  • Mix in two teaspoons of vanilla and mix well.
  • Add four cups of powdered sugar and beat.
  • Add in a 1/4 cup of whole milk and mix.
  • Add four more cups of powdered sugar and beat well.
  • Add up to 1/4 cup more whole milk  to reach your desired consistency.
  • Crush one cup of Oreos in food processor.
  • Fold crushed Oreos into icing.
  • Decorate cupcakes as directed.

cupcakes

Original Recipe and Idea can be found here!
Rose cake

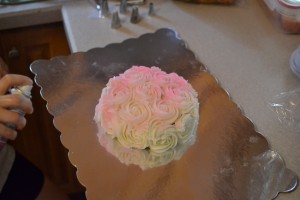
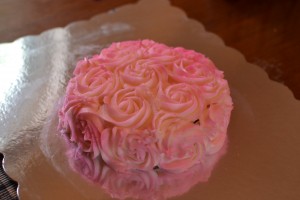
Had a few people ask how I made my daughter’s smash cake (aka Rose Cake) for her first birthday. So here’s a quick how to! This cake literally comes together in minutes! The fastest cake I make!

DSC_0190 cake

Smash cake is on the left and a two layer cake is on the right!

Directions:

1.  Start with coating your cake in a layer of icing and smooth it out…known as the “crumb coat”.

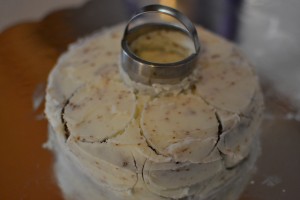
2.  Using a small biscuit cutter (or similar round object), mark small circles onto your cake.  This will help keep your roses similar in size, but is completely an optional step. See photos below. My apologies for my poor photography skills….I need some lessons;)

DSC_0013

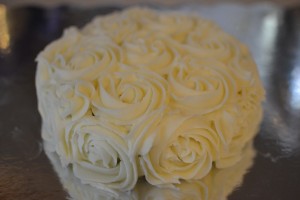
3.  Using a large decorating tip (I use a Wilton 1M), start with the side roses. Start in the center of the circle and slowly pipe around to make the rose.  Repeat until the entire side is covered with roses.

4. Repeat process on the top of cake.  If your have gaps between any of the roses, go back with your icing tip and lightly pipe a little icing into the gap.  It will hardly be noticed:)

DSC_0015

5.  I like to add a little color to my rose cakes by using a Wilton Color Mist Food Spray. Just give it a light coating of spray! Using two colors like pink and yellow can be fun too.  So many options!

DSC_0027

6.  All done!

DSC_0066

*I first starting making rose cakes last October after seeing it on Pinterest. I found this tutorial online from “I Am Baker” and highly recommend you checking it out if you want a more detailed explanation of how to make this cake.  I think the blog even contains a video! Now go make a cake!

Cream Cheese Sugar Cookie

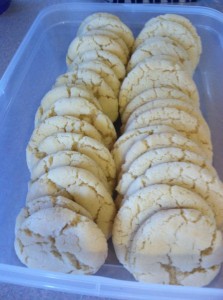
Sugar cookies are a favorite around here. After trying many recipes, I came across this one…it is my “go to” now! These cookies turn out so well each time….give it a try!

 cookie2

Ingredients:

2 1/4 cups all-purpose flour
1 teaspoon baking powder
1/2 teaspoon baking soda
1/2 teaspoon salt
1 1/2 cups sugar, plus 1/3 cup for rolling
2 oz cream cheese, cut into 8 pieces
6 tablespoons unsalted butter, melted and still warm
1/3 cup vegetable or canola oil
1 large egg, at room temperature
1 tablespoon milk
2 teaspoons vanilla extract

Directions:

1. Preheat oven to 350 F.

2. In a medium bowl, whisk together the flour, baking powder, baking soda, and salt. Set aside.

3. Combine 1 1/2 cups of sugar and cream cheese in a large bowl (no need to stir them together yet). Put the remaining 1/3 cup sugar in a bowl and set aside. Pour the warm butter over the cream cheese mixture and whisk to combine – the mixture won’t be completely smooth yet, that’s fine. Whisk in the oil then the egg, milk and vanilla extract. Mix until smooth.

4. Use a rubber spatula to start folding the dry ingredients into the wet.  Continue mixing until a soft dough comes together. Refrigerate at least 30 minutes. This dough is soft and sticky so it’s easiest to work with after it has been chilled.

5.  Make 1 inch balls and roll the balls in the sugar.  Place balls onto cookie sheet and flatten a little with the bottom of a glass.

6. Bake for 8 to 10 minutes. The cookies will not look quite done but that’s ok. You don’t want to bake them until they are brown…they would be crispy instead of nice and soft!

*Makes about 3 dozen cookies, depending on the size of cookie balls you make!

cookie

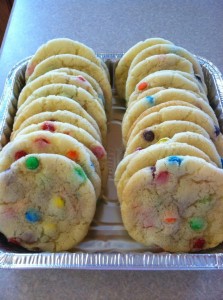
*For a fun variation, add a cup of M & M’s to the batter before refrigerating the dough.  If I add M & M’s to the batter, I will also add a couple of M & M’s to the top of the cookies just as I am pulling them out of the oven. Enjoy!

**Original recipe from Joyful Momma’s Kitchen.

Father’s Day Photo Gift

Just thought I would share a neat idea for a Father’s Day photo gift.  Last year I made my husband a collage of photos (one of each kid) with the letters, D, A, D! It turned out so cute with the nice frame I found at Hobby Lobby.  I can’t seem to find a picture of the final product…it’s at my husband’s office. I decided that each Father’s Day I would take new pictures of the kids and keep this present going! So here are the pictures I will add to the frame for this Father’s Day!

DSC_0014 DSC_0003DSC_0017

Just as a side note:

*If you only have one child, take three different poses with the letters to make a fun collage.

*If you have two kiddos, take a picture with each kid and the letter D.  Then take a picture of the two kids together holding the letter A!